Kitchen Display System
The Kitchen Display System (KDS) replaces paper tickets with a live digital screen in the kitchen. Every order placed at the table appears instantly on the kitchen display — only the dishes assigned to that kitchen. Chefs can accept, decline, or mark orders as ready with a single tap, keeping the entire team in sync without a word spoken.
Key Features of Kitchen Display System
1. Kitchen Setup
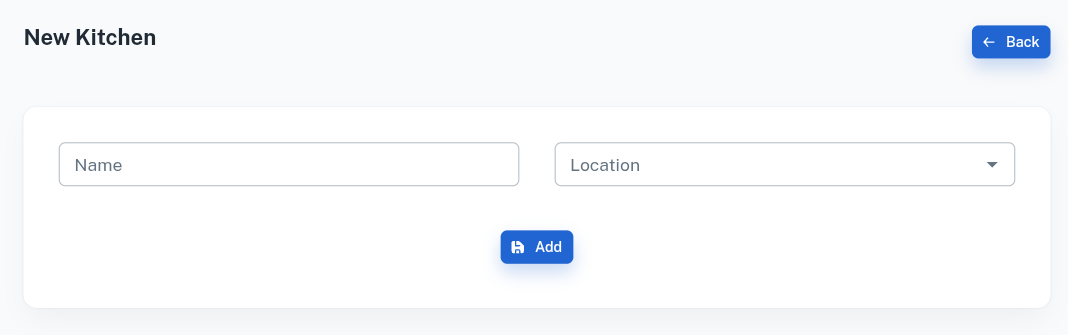
Create your kitchens with a name and location. Each kitchen operates as its own display — Main Kitchen, Bakery, Bar, or any section you run.
2. Product Assignment
Add products to each kitchen so the system knows exactly where every dish should go. A burger goes to the grill station, a cocktail to the bar — automatically, every time.
3. Automatic Order Routing
When a waiter places an order, the system checks which kitchen each product belongs to and sends it to the right display instantly. No manual forwarding, no missed tickets.
4. Live Kitchen Dashboard
The kitchen display shows all incoming orders in real time — table number, items, and quantities. Chefs always have a clear, up-to-date picture of what needs to be cooked.
5. Accept Order
Chef reviews the incoming order on the display and accepts it to confirm preparation has begun. The waiter and billing staff are updated automatically.
6. Decline Order
If a dish cannot be prepared — out of stock or any other reason — the chef declines it directly from the display. The floor staff are notified immediately so they can inform the guest.
7. Mark as Ready
Once a dish is cooked, the chef taps Ready on the display. The waiter receives an instant notification to pick up and serve — no shouting, no guessing.
How It Works
1. Set up your kitchens
Create each kitchen in the system with a name and location. Each one gets its own dedicated display.
2. Assign products to kitchens
Map every menu item to the kitchen responsible for preparing it. This is a one-time setup that powers all automatic routing.
3. Waiter places an order
Staff take the order from the table. The system instantly identifies which products belong to which kitchen and sends the KOT to the correct display.
4. Kitchen display shows the order
The assigned kitchen sees the order appear on their screen in real time — table number, items, and quantities clearly visible.
5. Chef acts on the order
The chef accepts the order to begin cooking, declines if the item cannot be prepared, or marks it as ready once cooking is complete.
6. Waiter is notified
The moment a dish is marked ready, the waiter gets an instant notification to serve. No delays, no manual communication needed.
Kitchen Order Dashboard
Overview
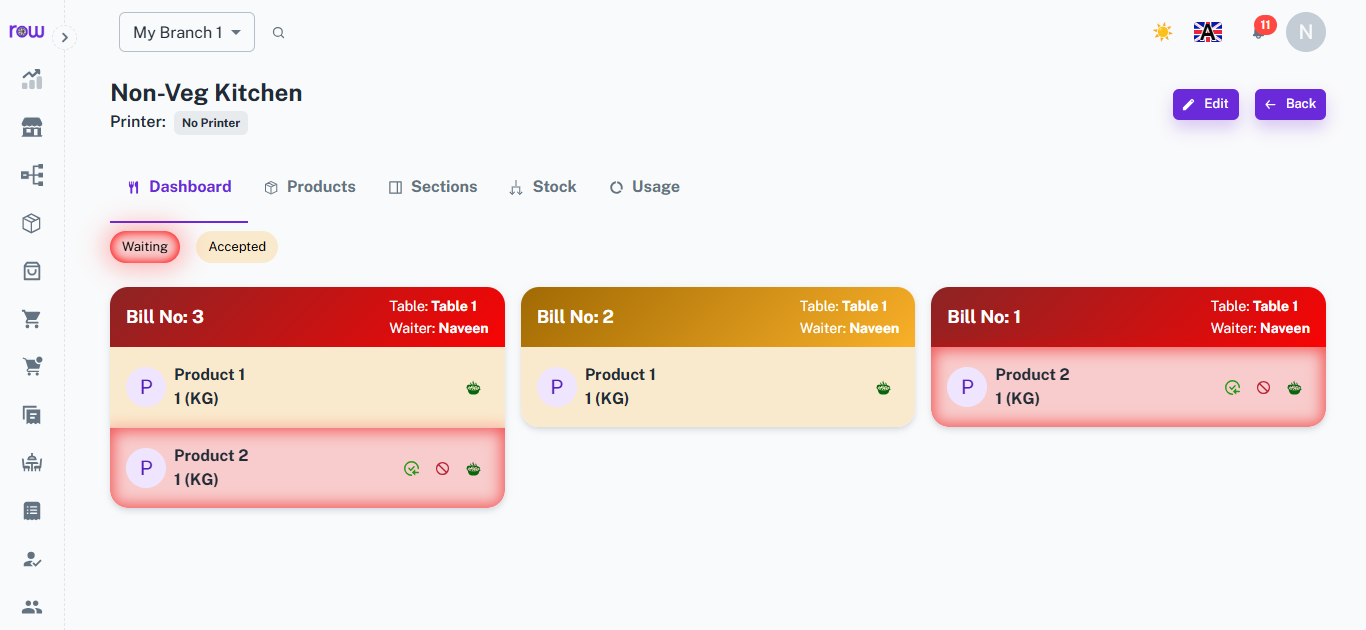
The kitchen dashboard shows every incoming order as a color-coded bill card, so kitchen staff instantly know what's new and what's already being prepared. One tap updates the order status and clears it from the queue once it's done.
Key Features
Red Status
When a new order arrives at the kitchen, the bill card shows up in red. This means the kitchen hasn't accepted it yet, so staff know it's waiting and needs attention.
Yellow Status
Once the kitchen accepts the order, the card turns yellow. This tells staff the order is confirmed and now in preparation, separating it from new, unattended orders.
Accept Order
Kitchen staff tap the accept icon on a red card to confirm they've received the order. The card then switches from red to yellow, moving it from "Waiting" to "Accepted."
Cancel Order
If an item can't be prepared, staff tap the cancel icon to reject it. The order is instantly removed from the kitchen dashboard, so there's no confusion about pending items.
Ready Order
Once a dish is prepared, staff tap the ready icon to mark it complete. This removes the item from the dashboard, signaling it's ready to be served.
Kitchen
Overview
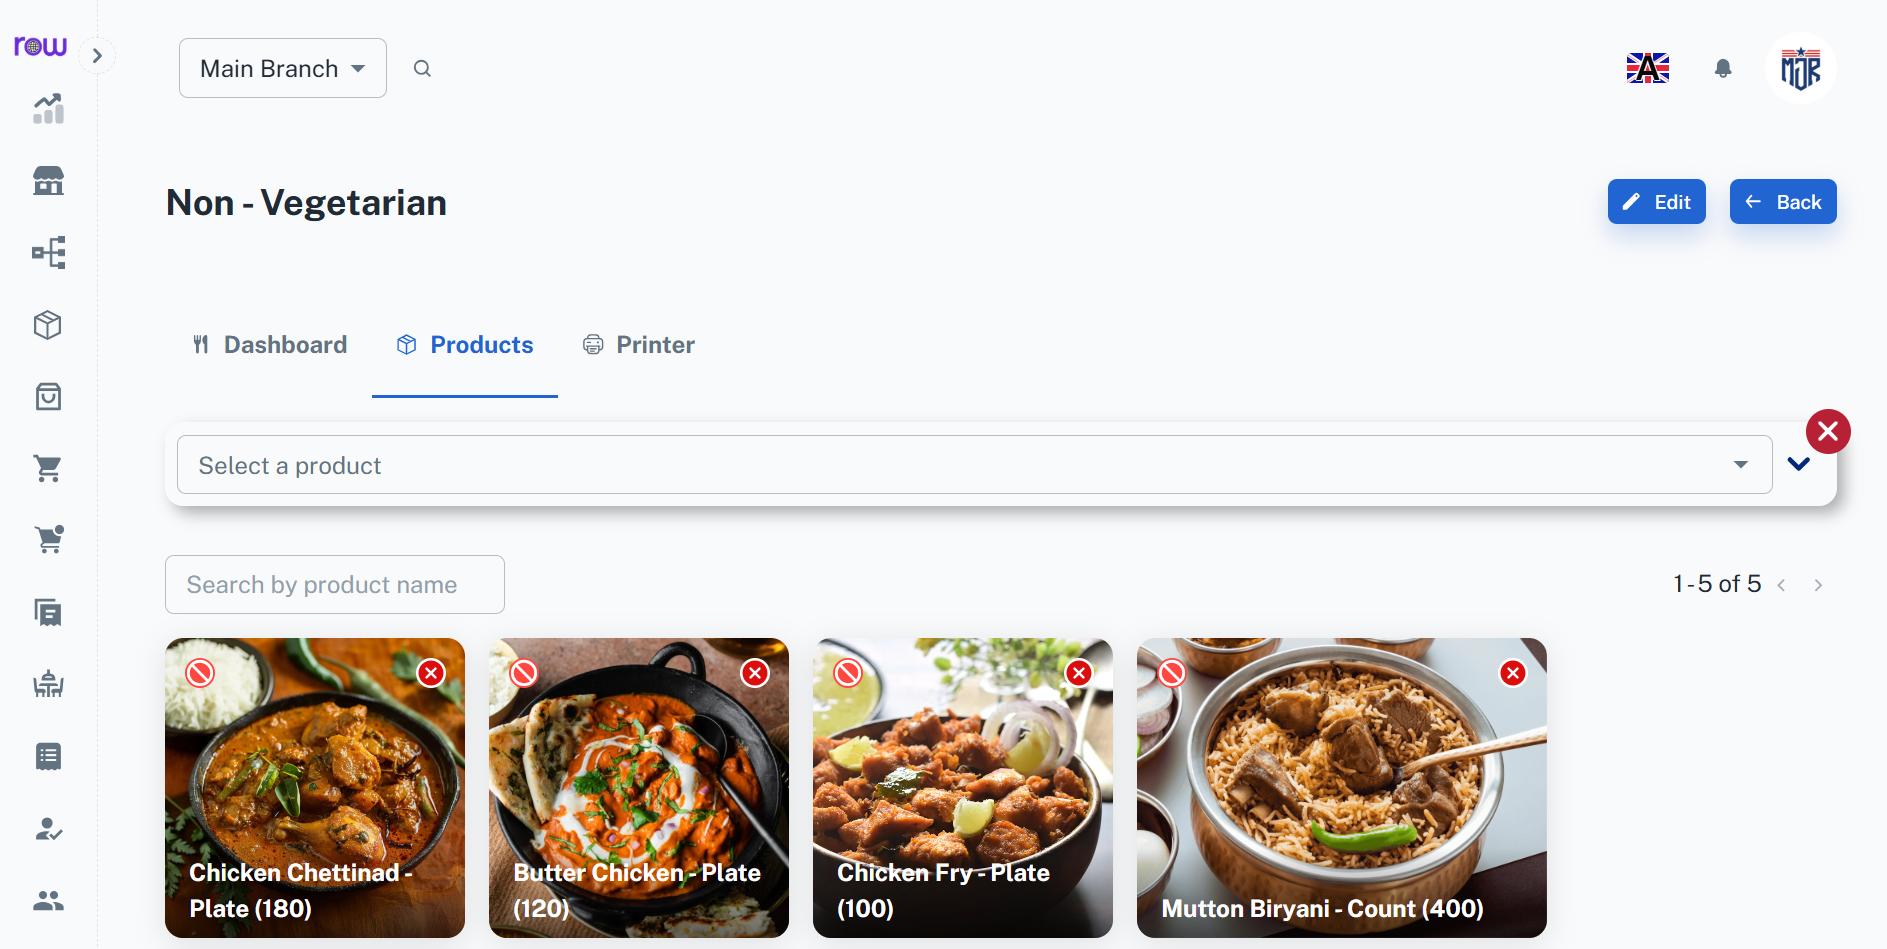
The Kitchen module connects the service area with the back-end staff. Once orders are placed, they are automatically routed to the correct kitchen based on product mapping. Kitchen staff can track items, mark them as prepared, and notify waiters in real-time.
Key Features
-
Kitchen Setup – Add multiple kitchens with fields like Name and Location for proper segregation (Main Kitchen, Bakery, Bar, etc.).
-
Dashboard – View live orders with table info, customer details, and cooking status in real-time.
-
Product Mapping – Assign specific products to kitchens so that items are sent to the right cooking area.
-
Order Actions – Orders are automatically routed to the assigned kitchens, where kitchen staff can accept, decline, or mark dishes as ready, instantly notifying the server.
-
Ready Notification – Once items are cooked, the chef clicks Ready, instantly notifying the waiter to serve.
-
Printer Integration – Orders are automatically printed in the respective kitchen for faster processing.
-
Improved Coordination – Reduces delays, minimizes errors, and ensures better communication between waiters and chefs.
Restaurant Store
Overview
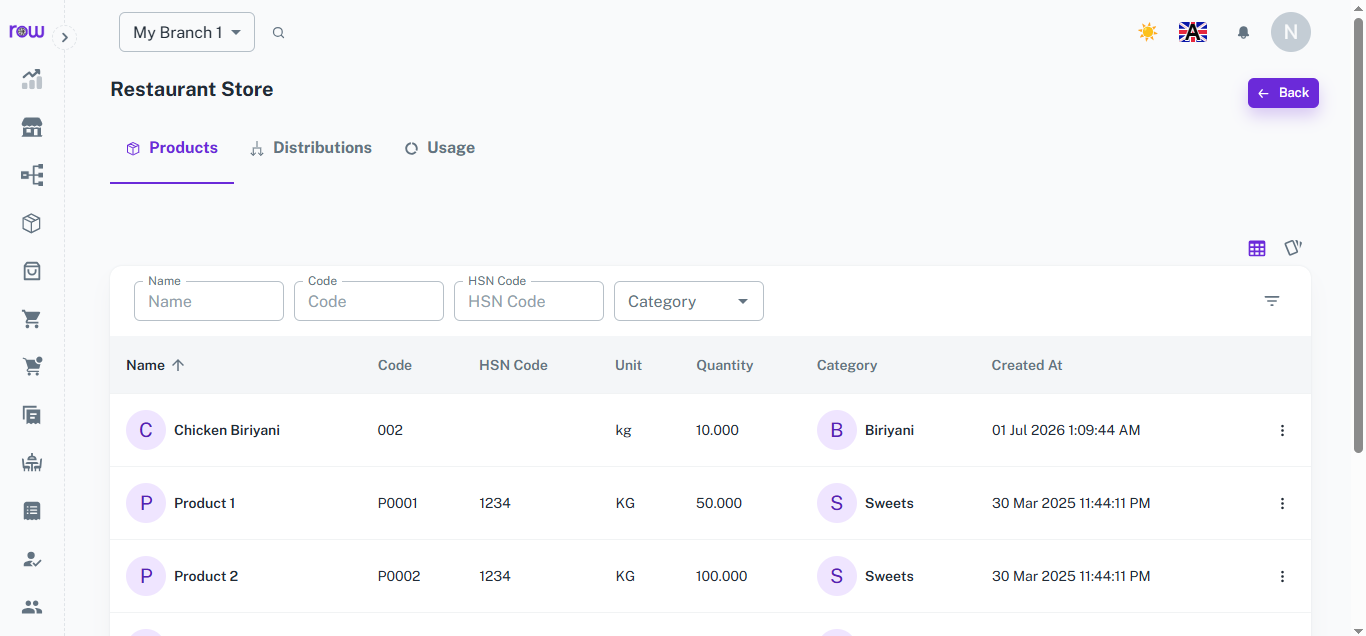
In the Restaurant Store Module, you can manage the flow of products between the store and the kitchen. This includes issuing products for kitchen usage and returning unused items back to the store.
Key Features
-
The module contains three main tabs: Products, Distributions, and Usage.
-
Products Tab
- Displays all available products in the store.
- Table Columns:
- Name – Product name
- Code – Unique product code
- Unit – Measurement unit (e.g., kg, liter, piece)
- Quantity – Available stock quantity
- Category – Product category or group
-
Distributions Tab
- Shows a record of all product distributions and returns between the store and the kitchen.
- Table Columns:
- Date – Distribution or return date
- Kitchen – Kitchen name or department
- Section – Kitchen section or area
- Distributed By – Person who issued the items
- Received By – Person who received the items
- Type – Transaction type (Distribution or Return)
- Products (Quantity) – List of products with quantities
- At the top of the table, there are two buttons: New Distribution and New Return.
- New Distribution Form: Used when products are issued from the store to the kitchen.
- Date
- Distributed By
- Received By
- Select Kitchen
- Select Section
- Select Products (with quantity)
- New Return Form: Used when unused products are returned from the kitchen to the store.
- Date
- Returned By
- Received By
- Select Kitchen
- Select Section
- Select Products (with quantity)
-
Usage Tab
- Displays the overall usage of products in the kitchen.
- You can filter the usage details by Kitchen, Day, Week, or Year.
- Helps analyze product consumption trends, monitor wastage, and plan inventory efficiently.
-
Workflow Summary
- Store issues products using the New Distribution form.
- Kitchen uses the received products; usage is recorded in the Usage Tab.
- Unused items are returned using the New Return form.
- All records are tracked for stock accuracy and audit purposes.
Workflow
Once a kitchen is created and products are mapped to it, the system runs automatically. When a waiter places an order, each product is routed to its assigned kitchen display. The chef reviews the order, accepts it, and begins cooking. If an item cannot be prepared, the chef declines it and the floor staff are notified instantly. Once the dish is ready, the chef marks it done — triggering an immediate notification to the waiter to serve. The entire flow runs without paper, without phone calls, and without delay.